Last weekend I posted about Docker Desktop Alternatives for macOS, and it looks like I missed one as the week before Podman release version v3.3.0 which introduced support for macOS by allowing you to launch a Podman managed virtual machine.
So, What is Podman?
Podman is a daemonless container engine for developing, managing, and running OCI Containers on your Linux System. Containers can either be run as root or in rootless mode.
As it has been built to run and manage OCI compliant container images it means that any images want to run built using any other Container engine, like Docker or containerd (which was covered in last weeks post using Lima) will also “just” work with Podman - to the point where the Podman developers are confident enough to claim that you add alias docker=podman on your machine as running Podman is nearly indistinguishable from running Docker.
Let’s put that to the test.
Installing Podman
As I am running macOS installing Podman using Homebrew is just a simple command:
brew install podman
Using Podman Machine
Once the podman client binaries are installed there isn’t much you can do with it other than connect to remote instances of Podman, this is because macOS is not able to natively run containers so we need to download a Linux image to run a virtual machine, to do this simply run the following command:
podman machine init
As you can see from the following output this downloads a custom Fedora image based on CoreOS:
Downloading VM image: fedora-coreos-34.20210904.1.0-qemu.x86_64.qcow2.xz: done
Extracting compressed file
Now that we have a copy of the image and the virtual machine has been created, we can now start the virtual machine by running:
podman machine start
This gives the following output, as you can see, there is a warning - but this release is hot off the press so we can forgive that:
INFO[0000] waiting for clients...
INFO[0000] listening tcp://0.0.0.0:7777
Waiting for VM ...
INFO[0000] new connection from  to /var/folders/q8/dplpdx9n7lz1r3m282_vcz440000gn/T/podman/qemu_podman-machine-default.sock
qemu-system-x86_64: warning: host doesn't support requested feature: CPUID.80000001H:ECX.svm [bit 2]
Once the virtual machine is up and running you can run the following command to open a shell to it:
podman machine ssh
Now we have a shell on the machine lets look at the operating system information:
Connecting to vm podman-machine-default. To close connection, use `~.` or `exit`
Warning: Permanently added '[localhost]:50983' (ECDSA) to the list of known hosts.
Fedora CoreOS 34.20210904.1.0
Tracker: https://github.com/coreos/fedora-coreos-tracker
Discuss: https://discussion.fedoraproject.org/c/server/coreos/

[core@localhost ~]$ cat /etc/*release
Fedora release 34 (Thirty Four)
NAME=Fedora
VERSION="34.20210904.1.0 (CoreOS)"
ID=fedora
VERSION_ID=34
VERSION_CODENAME=""
PLATFORM_ID="platform:f34"
PRETTY_NAME="Fedora CoreOS 34.20210904.1.0"
ANSI_COLOR="0;38;2;60;110;180"
LOGO=fedora-logo-icon
CPE_NAME="cpe:/o:fedoraproject:fedora:34"
HOME_URL="https://getfedora.org/coreos/"
DOCUMENTATION_URL="https://docs.fedoraproject.org/en-US/fedora-coreos/"
SUPPORT_URL="https://github.com/coreos/fedora-coreos-tracker/"
BUG_REPORT_URL="https://github.com/coreos/fedora-coreos-tracker/"
REDHAT_BUGZILLA_PRODUCT="Fedora"
REDHAT_BUGZILLA_PRODUCT_VERSION=34
REDHAT_SUPPORT_PRODUCT="Fedora"
REDHAT_SUPPORT_PRODUCT_VERSION=34
PRIVACY_POLICY_URL="https://fedoraproject.org/wiki/Legal:PrivacyPolicy"
VARIANT="CoreOS"
VARIANT_ID=coreos
OSTREE_VERSION='34.20210904.1.0'
DEFAULT_HOSTNAME=localhost
Fedora release 34 (Thirty Four)
Fedora release 34 (Thirty Four)
[core@localhost ~]$ exit
logout
Connection to localhost closed.
While you can open a shell to the machine it is not needed to run so let’s run some containers using the podman client on our Mac.
Using Podman
So now we have everything up and running let’s re-run the same command we used when testing Lima in the last post.
Hello World!!!
First up is the podman equivalent of running docker container run hello-world, as we have already stated that you can simply replace Docker with Podman it will be no surprise that the command is:
podman container run hello-world
As expected, this connects straight do the Docker Hub , pulls and then runs the image:
Resolved "hello-world" as an alias (/etc/containers/registries.conf.d/000-shortnames.conf)
Trying to pull docker.io/library/hello-world:latest...
Getting image source signatures
Copying blob sha256:b8dfde127a2919ff59ad3fd4a0776de178a555a76fff77a506e128aea3ed41e3
Copying blob sha256:b8dfde127a2919ff59ad3fd4a0776de178a555a76fff77a506e128aea3ed41e3
Copying config sha256:d1165f2212346b2bab48cb01c1e39ee8ad1be46b87873d9ca7a4e434980a7726
Writing manifest to image destination
Storing signatures

Hello from Docker!
This message shows that your installation appears to be working correctly.

To generate this message, Docker took the following steps:
 1. The Docker client contacted the Docker daemon.
 2. The Docker daemon pulled the "hello-world" image from the Docker Hub.
    (amd64)
 3. The Docker daemon created a new container from that image which runs the
    executable that produces the output you are currently reading.
 4. The Docker daemon streamed that output to the Docker client, which sent it
    to your terminal.

To try something more ambitious, you can run an Ubuntu container with:
 $ docker run -it ubuntu bash

Share images, automate workflows, and more with a free Docker ID:
 https://hub.docker.com/

For more examples and ideas, visit:
 https://docs.docker.com/get-started/
So far, so good.
Building and running an Image
Next, lets take the Dockerfile we built last time and try building it using Podman, as a reminder the Dockerfile looks like the following:
FROM alpine:latest
LABEL maintainer="Russ McKendrick <[email protected]>"
LABEL description="This example Dockerfile installs NGINX."
RUN apk add --update nginx && \
        rm -rf /var/cache/apk/* && \
        mkdir -p /tmp/nginx/

COPY files/nginx.conf /etc/nginx/nginx.conf
COPY files/default.conf /etc/nginx/conf.d/default.conf
ADD files/html.tar.gz /usr/share/nginx/

EXPOSE 80/tcp

ENTRYPOINT ["nginx"]
CMD ["-g", "daemon off;"]
To build the image you will need to checkout this repo and run the build command from the folder containing the Dockerfile. The command to build and tag the image is no different to the one which we would use in Docker:
podman image build --tag local:podman-example .
The output of the build is below:
STEP 1/10: FROM alpine:latest
Resolved "alpine" as an alias (/etc/containers/registries.conf.d/000-shortnames.conf)
Trying to pull docker.io/library/alpine:latest...
Getting image source signatures
Copying blob sha256:a0d0a0d46f8b52473982a3c466318f479767577551a53ffc9074c9fa7035982e
Copying blob sha256:a0d0a0d46f8b52473982a3c466318f479767577551a53ffc9074c9fa7035982e
Copying config sha256:14119a10abf4669e8cdbdff324a9f9605d99697215a0d21c360fe8dfa8471bab
Writing manifest to image destination
Storing signatures
STEP 2/10: LABEL maintainer="Russ McKendrick <[email protected]>"
--> 9e7e28e77e9
STEP 3/10: LABEL description="This example Dockerfile installs NGINX."
--> aa67eedf7b2
STEP 4/10: RUN apk add --update nginx &&         rm -rf /var/cache/apk/* &&         mkdir -p /tmp/nginx/
fetch https://dl-cdn.alpinelinux.org/alpine/v3.14/main/x86_64/APKINDEX.tar.gz
fetch https://dl-cdn.alpinelinux.org/alpine/v3.14/community/x86_64/APKINDEX.tar.gz
(1/2) Installing pcre (8.44-r0)
(2/2) Installing nginx (1.20.1-r3)
Executing nginx-1.20.1-r3.pre-install
Executing nginx-1.20.1-r3.post-install
Executing busybox-1.33.1-r3.trigger
OK: 7 MiB in 16 packages
--> 6a61a4653e9
STEP 5/10: COPY files/nginx.conf /etc/nginx/nginx.conf
--> f3a1faa6b75
STEP 6/10: COPY files/default.conf /etc/nginx/conf.d/default.conf
--> 4a57c732f37
STEP 7/10: ADD files/html.tar.gz /usr/share/nginx/
--> 2180b8083f4
STEP 8/10: EXPOSE 80/tcp
--> fe304c0d38d
STEP 9/10: ENTRYPOINT ["nginx"]
--> 4dda02ea2b7
STEP 10/10: CMD ["-g", "daemon off;"]
COMMIT local:podman-example
--> 88a4d1cbc6d
Successfully tagged localhost/local:podman-example
88a4d1cbc6dcf92cd4662da990e80125ad062c0ac99551e38c0a2e8eee9231f9
Once built you can use the following command to run the image:
podman container run -d --name podman-example -p 8080:80 --network bridge local:podman-example
Once running, open a browser and goto http://localhost:8080/ and you should be greeted by:

Info
Now the keen eyed amongst you may have noticed that the command to launch the container is a little slightly different than want we used in the last post, at the time of writing –network bridge is needed to map port 8080 from the virtual machine to 127.0.0.1 on the mac. The next release which is due in the next fortnight should resolve this.
Info
Update 10/10/2021 the update has been release and it works as expected, so you can remove the –network bridge from the command.
Other commands
From as you can see from the terminals below, other commands you would just run in Docker to manage your containers just work:
podman image ls
REPOSITORY                     TAG             IMAGE ID      CREATED         SIZE
localhost/local                podman-example  52add0470325  15 minutes ago  7.57 MB
docker.io/library/alpine       latest          14119a10abf4  2 weeks ago     5.87 MB
docker.io/library/hello-world  latest          d1165f221234  6 months ago    20.4 kB
podman container ls -a
CONTAINER ID  IMAGE                                 COMMAND         CREATED         STATUS                     PORTS                 NAMES
79e3825f608e  docker.io/library/hello-world:latest  /hello          37 minutes ago  Exited (0) 37 minutes ago                        lucid_chandrasekhar
8fd9aaa8febe  localhost/local:podman-example        -g daemon off;  9 seconds ago   Up 9 seconds ago           0.0.0.0:8080->80/tcp  podman-example
podman container stop podman-example
ERRO[3081] accept tcp [::]:8080: use of closed network connection
podman-example
podman container rm podman-example
podman container prune
WARNING! This will remove all non running containers.
Are you sure you want to continue? [y/N] y
79e3825f608e5f4a0ce8dd03849ecb55d5ff03eeff063a52c9e053bcde0460fc
podman image prune
WARNING! This will remove all dangling images.
Are you sure you want to continue? [y/N] y
Tidying up Podman
Once you have finished having a play with Podman you will need to stop the virtual machine, as you may have already guessed, to do this run the following command:
podman machine stop
Once stopped, you can start it back up again - order to remove the Virtual Machine altogether run:
podman machine rm
This will give the following prompt:
Warning
This will delete the virtual machine and everything on it, please make sure you really to do this before agreeing.
The following files will be deleted:

/Users/russ.mckendrick/.ssh/podman-machine-default
/Users/russ.mckendrick/.ssh/podman-machine-default.pub
/Users/russ.mckendrick/.config/containers/podman/machine/qemu/podman-machine-default.ign
/Users/russ.mckendrick/.local/share/containers/podman/machine/qemu/podman-machine-default_fedora-coreos-34.20210904.1.0-qemu.x86_64.qcow2
/Users/russ.mckendrick/.config/containers/podman/machine/qemu/podman-machine-default.json


Are you sure you want to continue? [y/N]
Once you have delete the virtual machine you will need to run podman machine init to recreate it again.
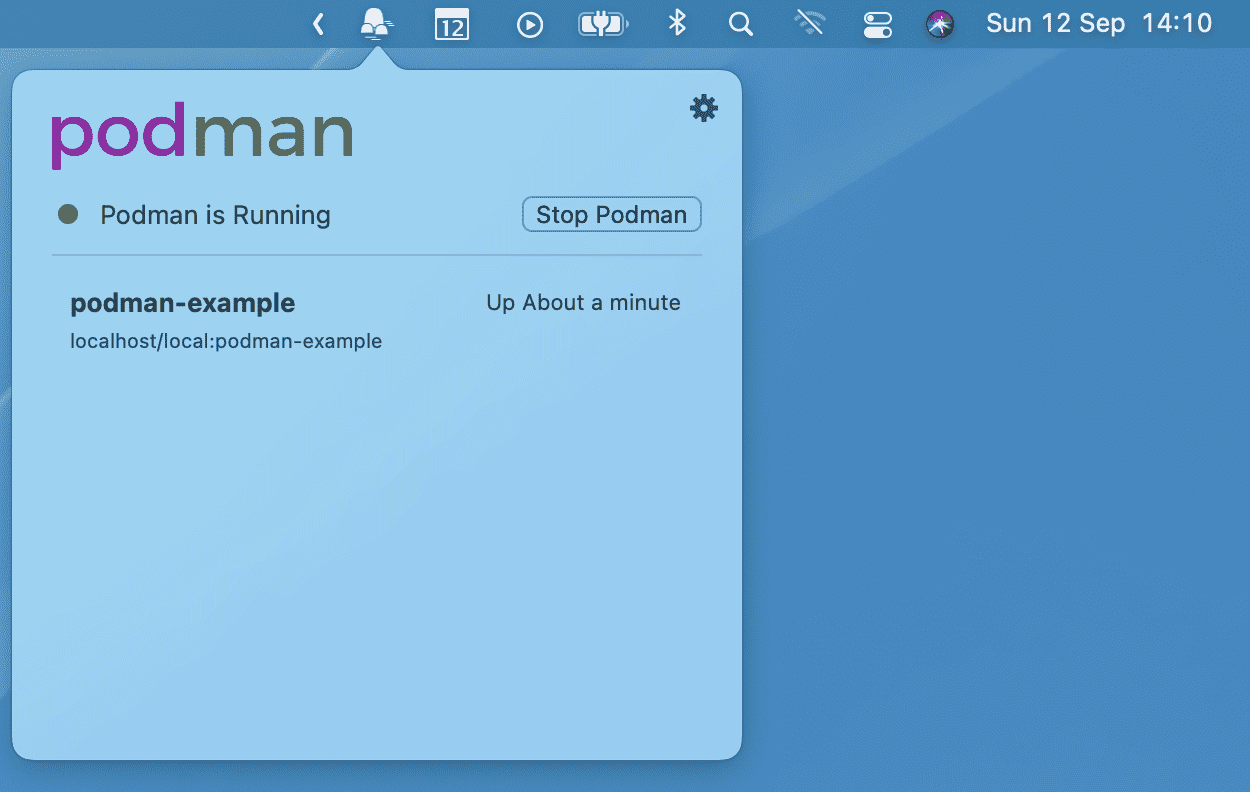
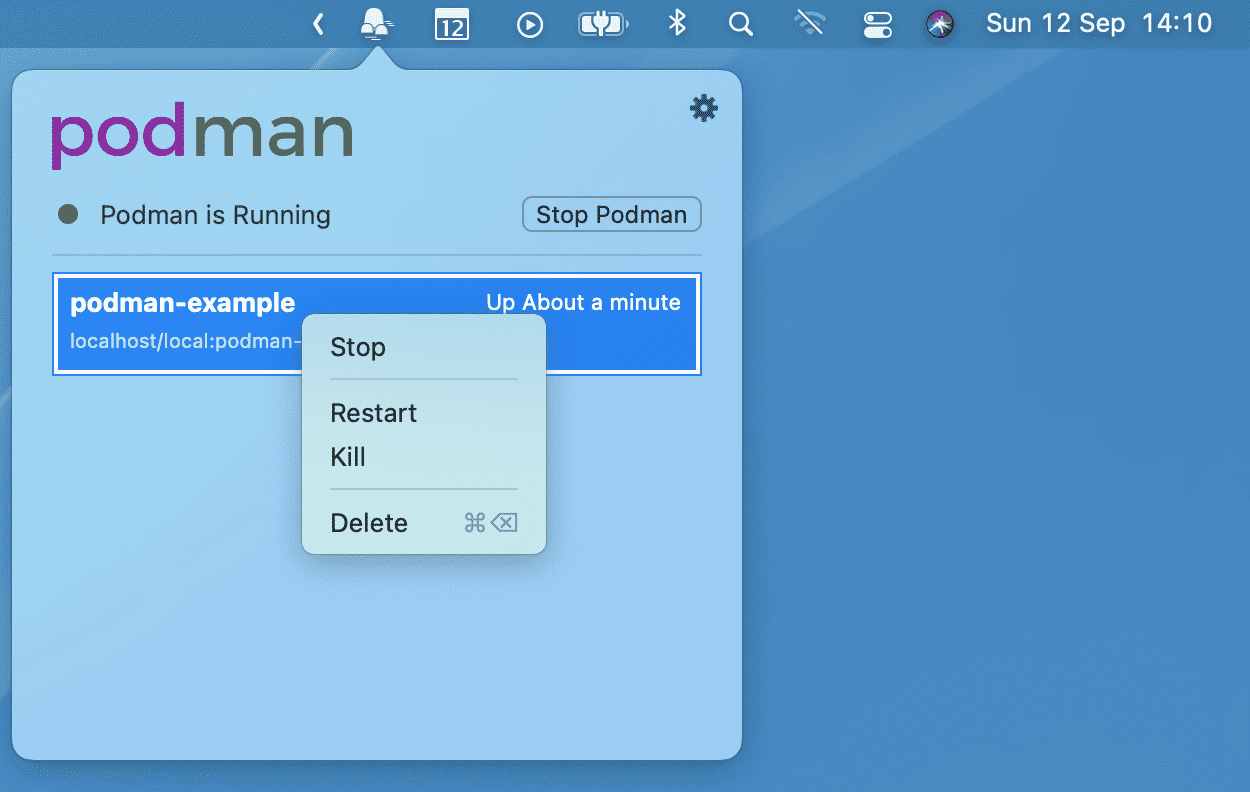
Bonus Desktop App
While currently there is not an official native Desktop app for Podman on macOS, Victor Gama has coded and released one which can be downloaded from heyvito/podman-macos , the screens below show the application in action …
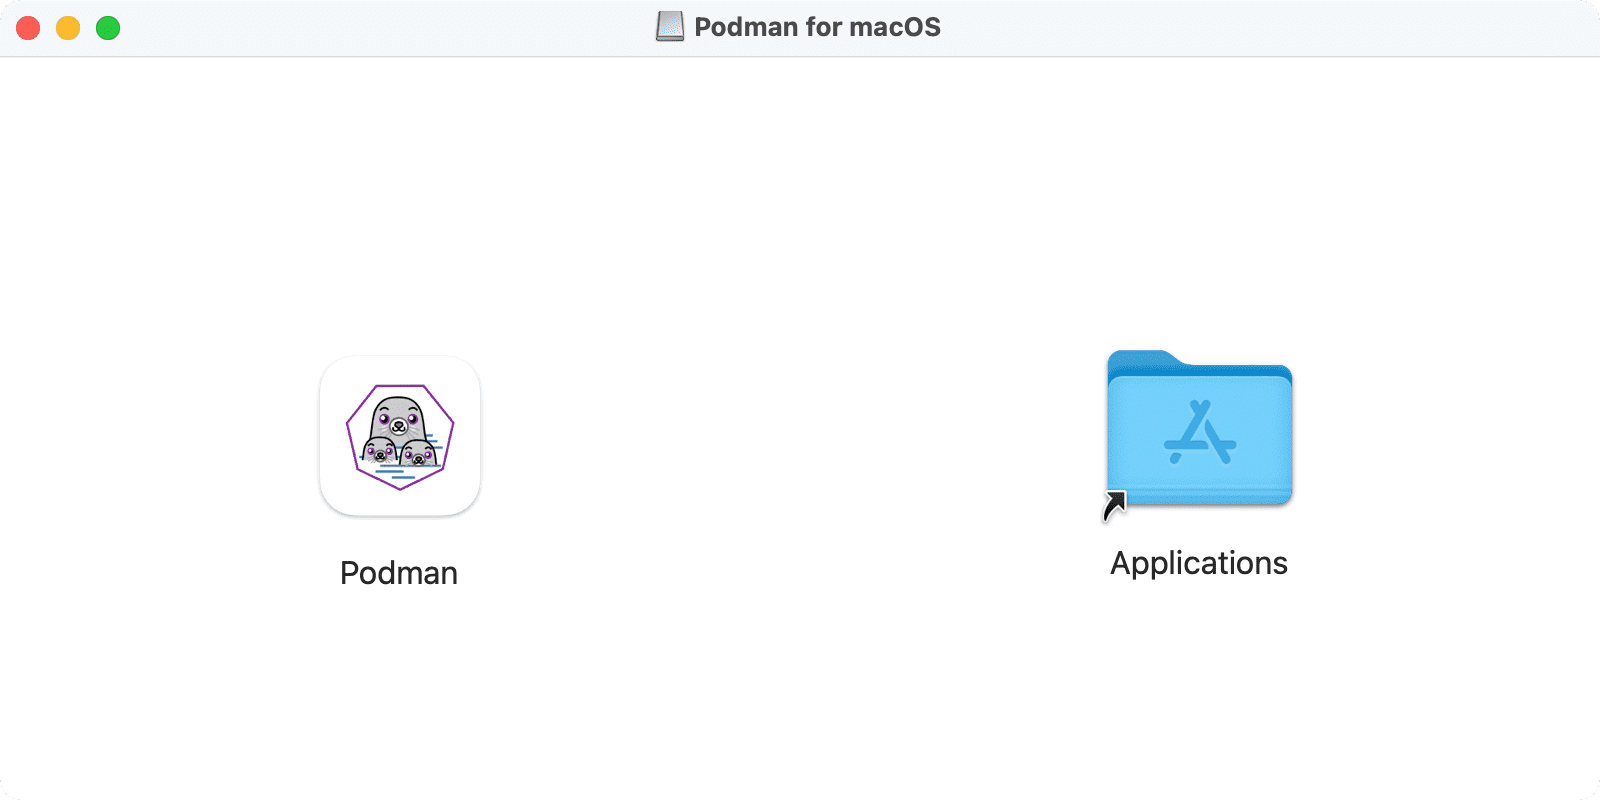
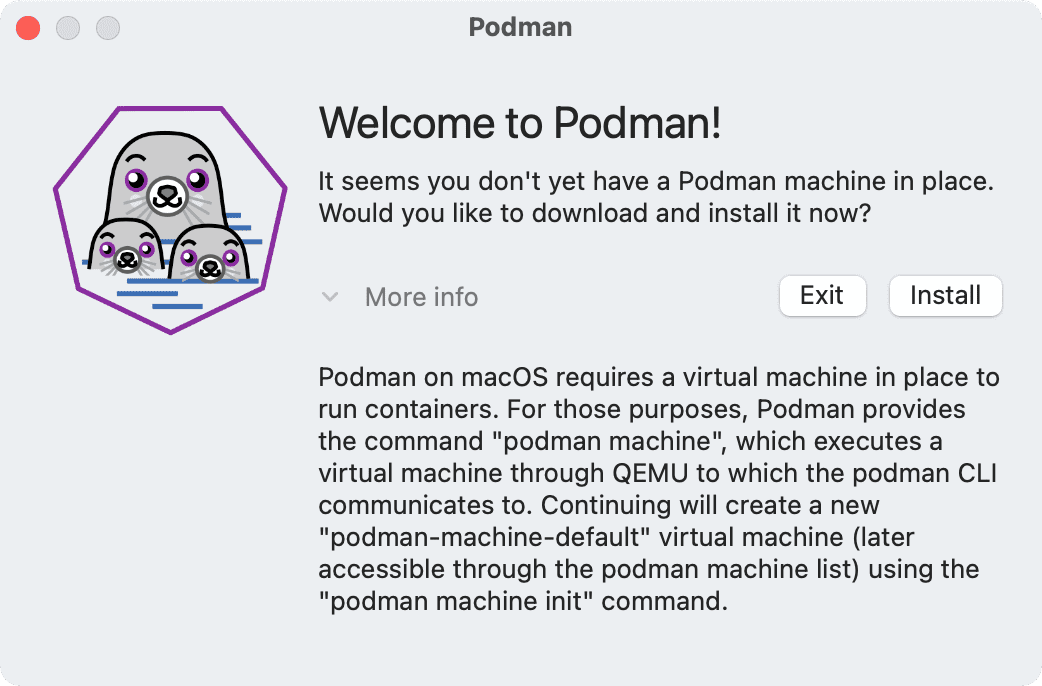
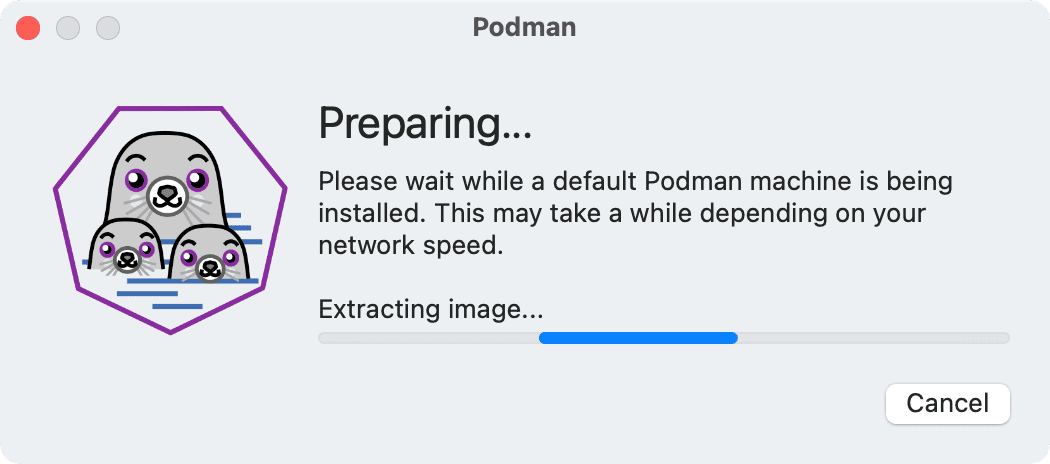
… at the time of writing of writing the application is less than a week or so old so I recommend keeping an eye on the repo for updates.
Summary
Podman has long been used on Linux machines, and the developers (RedHat) have been working on the macOS integration long before Docker announced their changes to the licensing model for Docker Desktop.
There are however some bugs, like the one mentioned, and also some functionality which needs to be in place - the biggest of which is the at the time of writing there is no native way to mount the filesystem from the host (macOS) into the virtual machine (Podman) which could be a deal breaker from some developers as this could block them from easily developing locally. However, the good thing is the Podman developers know all of this and are working hard to add the functionality on top of their already solid base.